Category Archives: Cleaning Tips & Tricks

Tracking down the Culprit: 7 Reasons Why an Unpleasant Smell May Be Coming out of Your Bathroom

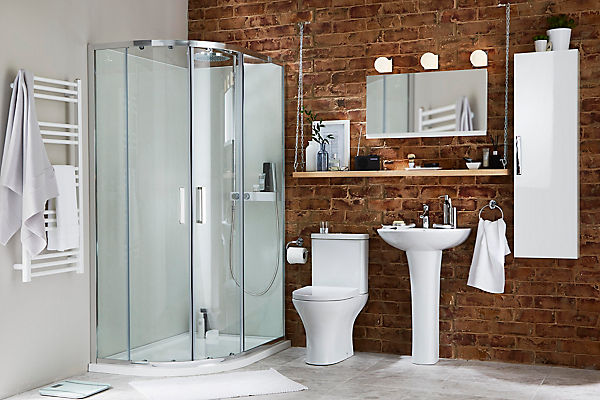
One of the most popular rooms for remodeling is the smallest in the house: the bathroom. There’s nothing worse than creating a beautiful bathroom for it to develop an unpleasant smell and spoil it. Nevertheless, even if you keep your bathroom meticulously clean, nasty smells can still emerge and ruin the effects of your interior design. No-one wants to have a beautiful but smelly bathroom after all!

You can find out more about how you can transform your bathroom into a luxurious haven and visit UniqueVanities.com but in the meantime, let’s take a look at how to prevent that unmistakable aroma of sewage permeating your home.

Here are 7 tips on what to look for when there’s a persistent pong emerging from your bathroom and what you can do to fix it:

  1. Check the Bathtub

Sometimes you can notice a smell coming from the bathtub drain. This isn’t actually caused by sewer gas although it can smell as though it is. Unpleasant smells from the tub drain are usually down to bacteria growing in some of the things that get lodged there, such as hair for example. If your bathtub is used regularly, it is more likely that things will get lodged in the drain quite a lot and so it’s important to clean the drain more often than for a guest bathroom for example.

There’s a quick fix for this kind of smell:

  • Pour half a cup of baking soda into the drain to clean and deodorize it
  • Follow that with half a cup of white vinegar poured directly on top of the baking soda
  • The foam that is created should be left to do its work for around an hour before rinsing
  • Repeat this process monthly to ensure the bathtub is always odor-free
  1. Is it the Sink?

Because sinks work in the same way as bathtubs and drain water out rather than letting it into the tub, they can sometimes stink a little for the same reasons. Regularly brushing your hair over the sink or rinsing toothpaste down the drain can lead to blockages which are a breeding ground for bacteria.

Using the same process as above once a month cleans and deodorizes the sink’s drains in the same way. Obviously, the more a sink is used, the more often you may need to repeat this process.

  1. The Toilet?

There are a number of reasons why a toilet can start smelling including the following:

The water in the toilet bowl has evaporated which happens more with toilets that are not used very much

  • A broken seal under the toilet which allows sewer gas to leak into the bathroom
  • Bacteria collected in the sides of a toilet trap
  • An internal crack in the toilet bowl which can cause the water level in the bowl to drop
  1. The Shower?

Showers are fitted with something called a p-trap which is a piece of pipe designed to hold water. The job of this piece is intended to prevent sewage gases from coming up the shower drain and creating unpleasant smells in your bathroom. Thoroughly cleaning the p-trap which is located under the drain will ensure it remains bacteria – and odor-free.

Using baking soda and vinegar as above will help to keep the p-trap free of blockages. It’s only natural to expect to clear the p-trap as often as the shower is used and so it’s less likely that you’ll need to clean a shower in a guestroom as regularly. This process helps to break down any organic waste that’s built-up in the p-trap and deodorize the shower.

  1. Blocked Plumbing Vents

Most bathrooms have some kind of vent system to release any odors and also to prevent a build-up of humidity which can lead to damp. Sometimes the vents can become blocked, particularly on the outside of the property, with leaves and other organic matter.

Most bathrooms have extractor vents to take out the humidity in the room. These also become blocked over time and can create extra humidity in the bathroom which can lead to damp. It’s important to keep all vents clear as part of your home maintenance, whatever their purpose.

When the vents have become blocked, bacteria will form among the organic matter and create a pungent sewage smell. Blocked vents are relatively easy to clean and should be maintained regularly to prevent bad smells in the future.

  1. Blocked Drainage System

When a drainage system has become blocked, it is often not possible to find out where the blockage is and clear it yourself. In these cases, you will need to hire a firm using special cameras they feed into the drainpipes to detect blockages. Then they use specialist equipment to shift the blockage so that all bacteria trapped in the system is eliminated and shifts the bad smell in the process.

Of course, if you regularly clean your vents and outside drains as part of your home maintenance program, you’re more likely to avoid having to call in the professionals. Obviously, the fall is without doubt the worst season for falling leaves causing blockages in drains and so you’ll need to up the ante on your home maintenance during this time.

  1. General Damp

Sometimes when rooms have been converted into bathrooms, they are not sufficiently protected to deal with the shift in purpose. Imagine a former bedroom becoming a wet-room for example and you can understand that you have to make sure the walls, floors and ceilings are prepped for the change. This avoids damp from developing in your bathroom and creating unpleasant odors.

The other issue you will have with damp is that it can cause health issues at home. Damp eventually leads to mould which has spores which can spread bacteria around your bathroom. This can have a harmful effect particularly on young babies or people with respiratory problems. The way to avoid mould forming in the first place is to fix any damp issues before they become serious.

Yes, You Can: Clean Your Home From Top to Bottom Without Using Harsh Chemicals

If you care about the environment and want to make changes that make your lifestyle more environmentally friendly, a good place to start is with your household cleaning products. Switching to green cleaning methods doesn’t have to be costly. There are plenty of substitutions you can make that are kind to your pocket and won’t harm the earth.

Natural Substitute for Harsh Cleaning Chemicals

When it comes to natural cleaning products, often the easiest thing to do is make your own. Here are a few simple suggestions.

All-purpose Cleaner: In a spray bottle add ½ cup of white vinegar with 4 drops of tea tree oil and 2 tablespoons of baking powder. Top up with water and shake to mix thoroughly. This is a very efficient cleaner. The white vinegar is great for dissolving grease and grime, and removing stains. The tea tree oil kills pathogenic bacteria that can cause illness and the baking soda is a deodorizer that also has antibacterial properties.

Dishwasher Detergent: It’s easy to make your own environmentally friendly dishwashing detergent simply by combining 1 cup each of washing soda and borax, ½ cup of lemon juice and ½ cup of salt. Just one tablespoonful per load should do the job just as good as any store-bought detergent.

Glass Cleaner: Keep your windows, mirrors and glass table tops sparkling with this homemade cleaner. Combine four cups of water, add a tablespoon of starch, ½ cup of white vinegar, and ½ cup of rubbing alcohol. This will clean dirt and greasy fingerprints from glass and leave it shining and smear-free.

Natural Air Freshener: This is an easy way to make your house smell fresh and clean, just don’t let the pan boil dry. Fill a 2-quart pan with water and bring it to the boil. Add 2 sliced oranges, a tablespoon of cinnamon and a tablespoon of cloves. Alternatively, add 2 sliced lemons, 2 tablespoons of rosemary and four drops of vanilla.

Natural Laundry Detergent: This recipe is easy to make and very affordable. Finely grate a bar of Castile soap. Boil a 6-quart pan of water and add the soap and stir in 1 cup of washing soda and 1 cup of borax. Pour mixture into a 5-gallon bucket and top up with hot water. Add 30 drops of lavender oil for a fresh scent. Put the lid on and leave it overnight for the mixture to cool. It should set into a creamy liquid. You now have 5 gallons of natural laundry detergent.

Floor Cleaner: You can clean natural and laminate floors simply by adding a cup of white vinegar and 10-15 drops of your favorite essential oil to a bucket of hot water.

Mattress and Upholstery Freshener: Fill a cheese shaker with baking soda and add a few drops of tea tree oil. Shake over mattress or upholstery, leave for an hour then vacuum.

Furniture Polish: Sealed wood can be polished with a few drops of lavender oil and olive oil on a soft cloth.

Heavy-duty Cleaner: This mixture is great for cleaning a greasy stove top, soap scum, grout and kitchen sink stains. Simply mix a cup of baking soda with enough hydrogen peroxide to make a paste. Spread it on the stain then scrub it away with a brush or coarse sponge.

Toilet Cleaner: Find a spray bottle that has a streaming jet option and fill it with neat white vinegar. Stream it around the bowl and under the rim then scrub with a toilet brush. You can also add 10 drops of tea tree oil as a disinfectant.

Bathtub/Shower Cleaner: Sprinkle kosher salt over the surface of your tub or shower and rub over with a half grapefruit. It will remove soap scum and stains and leave your bathroom smelling fresh.

Shower Head Cleaner: Fill a plastic bag with enough white vinegar to cover the shower head. Tie around the shower head and allow to soak for 15 minutes.

Stain Removal: Store bought stain removers contain very harsh chemicals. A mixture of 50/50 Hydrogen peroxide and water will remove stains like sweat, grass, food, and urine. Grease stains can be removed with chalk powder or baking soda then soaked in undiluted white vinegar for 15 minutes.

To start using these eco-friendly ideas around your home, remember to stock up on the natural ingredients so you always have them at hand. You will need, spray bottles, kosher salt, lemons, white vinegar, hydrogen peroxide, baking soda, tea tree oil, cinnamon, lavender oil, castile soap, washing soda, and borax. The initial cost of having these items at hand may seem steep, but by switching to homemade solutions instead of commercial ones, the money you will save in the end will surprise you, and the planet will thank you!

Charlotte Hurst is slowly but surely banishing harsh chemicals from her home 1 bottle at a time. Due to some health problems and seeking to lead as green a life as possible Charlotte is keen to let others know about her mission too.

New Year, New Home: Transforming Your Messy Living Space for 2017

It’s hard to believe that another year has come and gone – and your home is still the unruly mess it always was. Despite last year’s resolutions to sort through your closets and clean out your cupboards, your home remains as cluttered and chaotic as ever.

However, with renewed determination and a foolproof plan, you can’t fail to clean up your house in 2017. The following home transformation strategy will get your living space under control in under a month (without making you feel overwhelmed) – which gives you 11 more to rebuild the mess before 2018.

Week 1: Kitchen

Day 1: Drawers. Any utensils that are burned, melted, mismatched, or unused (such as outgrown baby spoons) should be donated or tossed out. Once your drawers are empty, you should scrub them thoroughly and consider replacing the lining paper.

Day 2: Cabinets. The same tactics should be used here, but instead of utensils, you will be looking for unwanted or unusable cookware or appliances. Additionally, organization is even more important in cabinets, as unstable stacks of bowls or pots can crash to the ground with the slightest provocation.

Day 3: Pantry. Newsflash: Canned goods can go bad, and so can items like chips, dried pasta, soda, and flour. You should toss everything that is well past its expiration date, and donate shelf-stable foods you know you’ll never eat. Then, organize your pantry by food type.

Day 4: Fridge and freezer. Just because something isn’t moldy doesn’t mean it isn’t bad. You should take some time to check expiration dates on bottles and jars, inspect packages for freezer burn, or perform sniff tests for edibility. You should also wipe off fridge shelves and chip away at ice in the freezer quickly, before all your food thaws.

Day 5: Junk storage. Every home has at least one junk drawer, and most have an entire junk cabinet. You probably don’t need to sift through your junk storage space with a fine-toothed comb, but you should peek in to extract obvious trash or useful items that belong elsewhere.

Week 2: Living Room and Bathrooms

Day 1: Bookshelves. You can never have too many books – until you do. Odds are you and your family won’t reread more than half of the tomes sitting on your shelves, which means you should be able to get rid of them without feeling illiterate. If your bookshelves are covered not by well-read volumes but instead by pointless clutter, remove the junk and make a rule about what items are appropriate for your bookcase.

Day 2: Storage furniture. The chest that serves as a coffee table, the entertainment center that hides your electronics, the desk in the corner piled high with who-knows-what – all need to be sifted through and sorted. In the end, you might realize that you don’t need the additional storage in the living room, anyway.

Day 3: Linen closet. Somehow, sheets and towels get mixed into the same pile; washcloths offset the delicate balance of stacked linens; and your bathroom closet becomes a storage space for toys and clothes. Filter out the items unnecessary in the bathroom and reorganize the towels and sheets into neat stacks.

Day 4: Shower. People often overlook the clutter in their showers, assuming guests will never peer past the curtain and judge the mess. However, shelf space is at a premium in the shower, so any body wash or shampoo that is unused should be tossed pronto. While all the bottles are removed, you can wipe away soap scum and mildew that you didn’t notice during your morning rinse.

Day 5: Medicine cabinet. Like canned goods, medications can go bad. Sort through your ancient cold meds, pain relievers, and prescriptions and toss those that might endanger your family’s lives. You should also get rid of all those lotions you’ve been given during the holidays – you’ll never use them.

Week 3: Bedrooms and Office

Day 1: Closet and dresser. If you haven’t sifted through your clothes in a while, now is the time. Clothing that is too big or too small should be given up, as should outdated styles or loathed outfits.

Day 2: Nightstand. Covered in hair ties, lotions, scraps of notes, jewelry, half-empty water bottles, and other odds and ends you shed while you are comfy in bed, your nightstand is your bedroom’s catch-all. Spend some time putting everything back in its proper place, and organize your nightstand so only morning and evening essentials are within reach.

Day 3: Filing cabinets. The IRS can only audit you within three years of a tax return, which means you don’t need to hold onto your financial records from 10 years ago. Additionally, especially sensitive documents, like birth certificates or social security cards, should be kept in a fireproof safe, which means they shouldn’t be cluttering your office cabinets.

Day 4: Mail stacks. It only takes a few days for junk mail to form teetering stacks. If you don’t even glance at ads and flyers, you should sign up for paperless billing and immediately toss your mail into the recycling bin. Otherwise, you should clean up what mail has accumulated and designate a specific mail place where you will sift through it every day.

Week 4: Everywhere Else

Day 1-2: Garage. Odds are, if it’s in the garage, you don’t use it that often. A family boat that’s growing cobwebs, bikes that have rust and flat tires, and other toys big and small that haven’t been used in ages should go directly to charity (while you enjoy a deduction on your taxes). You should also devote time to peeking in storage boxes to see if you truly need to keep that stuff. Your goal should be to make enough space for at least one car to fit inside.

Day 3: Hallways. The entrance to your home should always be sparkling, since it is the first thing your guests will see. If your family has a habit of shedding coats and shoes in the hallway, you should install hooks and cubbies that will hide the mess.

Day 4: Porch. Gardening equipment, toys and tools, and other outdoor gear can clutter a porch fast. If you don’t already have designated places for these items, make some: pegboard or outdoor bins are the easiest solutions.


5 Tips for a Successful Fall Reset with Swiffer and Febreze+ Giveaway – Ends 9/29

The kids are back in school, the weather is cooling off, the leaves are falling from the trees, and that can only mean one thing; fall is upon us.

Fall is my absolute favorite season, for so many reasons. I love the cooler nights, having windows open, hearing the rustling of the leaves and all of the events that come with it.

Most people get crazy about spring cleaning, but for me, I am all about fall cleaning, or a fall reset. By a fall reset I mean getting our home and everything else ready for the changing of the season.

Get Ready for Fall with These Tips

When it comes to getting our home ready for fall, I have a strict list of items that I like to get done. Since we are in Wisconsin, there are a lot of things that need to be taken care of before winter hits and I like to take care of it all during my fall reset.

Pack Away Your Warm Weather Clothes

Before packing away your warm weather clothes, be sure to pull out any sizes that are too small. I know my kids are constantly growing and most items don’t fit them from one season to the next. We like to donate any items that are too small to our local thrift shop. Once we have everything sorted, we store all of our warm weather  clothes in storage bins either under beds or in our basement.

Clean Out the Closets

Fall is also the perfect time to make sure all of your closets are clean and in order. Make sure you remove any shoes, jackets, blankets, bedding, etc. that are no longer needed. 

Throughly Clean All Flooring

Yes, it is important to clean your floors on a regular basis but it is during this time that I like to make sure every little nook and cranny of flooring in our house gets throughly cleaned. I start by moving all of our furniture, sweeping, and then swiffering everywhere. 

Since we have all hardwood and vinyl floors in our home, we are able to do all of this with the help of a Swiffer Wetjet.

With 7 people and a giant dog, there is always something on our floors to clean up and I perfer the Swiffer Wetjet for cleaning our floors because it really gets the job done. I am always amazed at how much dirt it really does remove from our floors! 

The New & Improved Swiffer WetJet gives you a more thorough clean in just minutes. That’s because the ABSORB + LOCK™ strip helps trap dirt & grime deep in the pad. I used the new pad with ABSORB + LOCK™ strip for improved absorption of dirt/grime on our living room floor and couldn’t believe how well it removed the dirt and grime.

The New & Improved Swiffer WetJet also comes with a new solution formula for more effective cleaning, has a dual-spray nozzle solution dispense for a powerful floor clean, offers a reinforced handle that releases the perfect amount of solution with the touch of a finger, a stronger pad attachment to keep your cleaning pad in place as you clean and it is safe for cleaning virtually every finished wood floor type.

Refresh Your Furniture

After a season of sweaty and, let’s face it, dirty, smelly kids, climbing on my furniture, I like to give them all a nice cleaning. I start by removing all of the cushions and cleaning underneath them, spot treating any stains and then spraying them down and make them smell good again with some Febreze Fabric Refresh. I am hooked on the new Big Sur scent, it is the perfect mix of the outdoors for me!

Refresh the Air

I’m sure most of us have had the windows closed and the A/C running all summer long to combat the heat. I hate the smell of the house when it is all stuffy and once I can open the windows and get some fresh air circulating, I like to add some great scents to it using Febreze Air Effects and NOTICEables. The both no how to fight off certain smells in the air and make everything smell better.

Share Your Tips

These are just some of our tips for our fall reset, please feel free to share some of yours in the comments below, we love to hear from our readers.

Win a Swiffer Wetjet & Febreze Prize Pack 

You can enter to win a Swiffer Wetject & Febreze prize pack to help get you with your fall reset using the form below. 

This giveaway will end on 9/29/2016 at 11:59pm CST. Winner’s will be contacted via email and will have 24 hours to respond with their mailing information to claim their prize. The Megalomaniac Mommy is not responsible for prize fulfillment. Any questions, please contact us.

*The Megalomaniac Mommy policies on giveaways can be found here.

Swiffer Wetjet Febreze Prize Pack

Cleaning Tips for Busy Moms

Being a busy mom and taking care of everyone else before taking care of yourself often leaves you feeling drained and unable to complete every task on your to-do list. Oftentimes, being too busy means you can’t even find the appropriate amount of time to properly clean your home and keep it organized and looking its best.

Photo Source

If you’re too busy but you want to make sure your house is always clean, check out the tips below.

Have Someone Else Take Care of the Laundry

Laundry days can be exhausting, and they can be extremely tedious as well. After your family has piled up their dirty clothes, it is up to you to make sure everything gets washed, dried, folded, and put away. But you can save time doing your laundry by using a service that will have your dry cleaning picked up from your home. Dry cleaning experts will pick up your clothes, bring them to get cleaned, and then drop them off at your home, saving you loads of time that you otherwise would have spent driving to the cleaner and back.

Invest in a Robot

Investing in a robot vacuum is definitely worthwhile because you will be able to clean your floors without any effort whatsoever on your part. There are many different models to choose from in a wide range of prices, so you can find the one that has the specs and price you need. Then all you have to do is set it to clean one or more rooms totally on its own while you are busy doing something else. 

Stay Organized

Being organized means you will be able to keep things off the floor and out-of-the-way, and this will make it easier to keep things clean rather than allowing them to collect dust and debris. Keep your kids’ toys in bins, have hampers in each bedroom to keep clothes off the floors, and have baskets for things like toiletries and makeup in the bathroom. Again, the key is to keep as much off the floor and off your countertops so that you can make it easier to clean everything.

Don’t Do Everything at Once

If you set aside one day to clean your entire house, it will be nearly impossible to accomplish this task. Instead, try to create a cleaning schedule that will be easier for you to follow. For example, maybe dedicating one room to one day of the week is the best way to ensure you can clean as you go.

Have Your Family Help Out

Finally, make sure your family understands that you are not able to do everything on your own. Don’t be afraid to delegate tasks to your spouse and to your kids by setting up a chores schedule.

Even though you may feel like there aren’t enough hours in a day because you are such a busy mom, there are several different strategies and products that you can employ in order to save time while maintaining a clean and happy home.